You have probably heard or know that being on Facebook is important (as long as your customers are on Facebook) and a missed opportunity for those that don't have a presence there, especially if you don't set up an optimized Facebook Fan Page.
Instead, you might grudgingly log in to Facebook, create a page, write a sentence-long description about your business, add a pixelated logo as your profile picture and then wait for the fans to start rolling in. BUT, that is not how it works if you want a Facebook Fan Page that will be of any value to your business!
Sure, you can do all of that and you will technically BE on Facebook, but you have essentially wasted your time as few people of value will stumble across your Page and even fewer are likely to connect with you and become a fan.
So what do you do?
Investing a little time and energy NOW to setting up and optimizing your Facebook Fan Page will go a long way toward building a community of very targeted fans that will eventually buy from you.
1. Choose the right Facebook Fan Page type
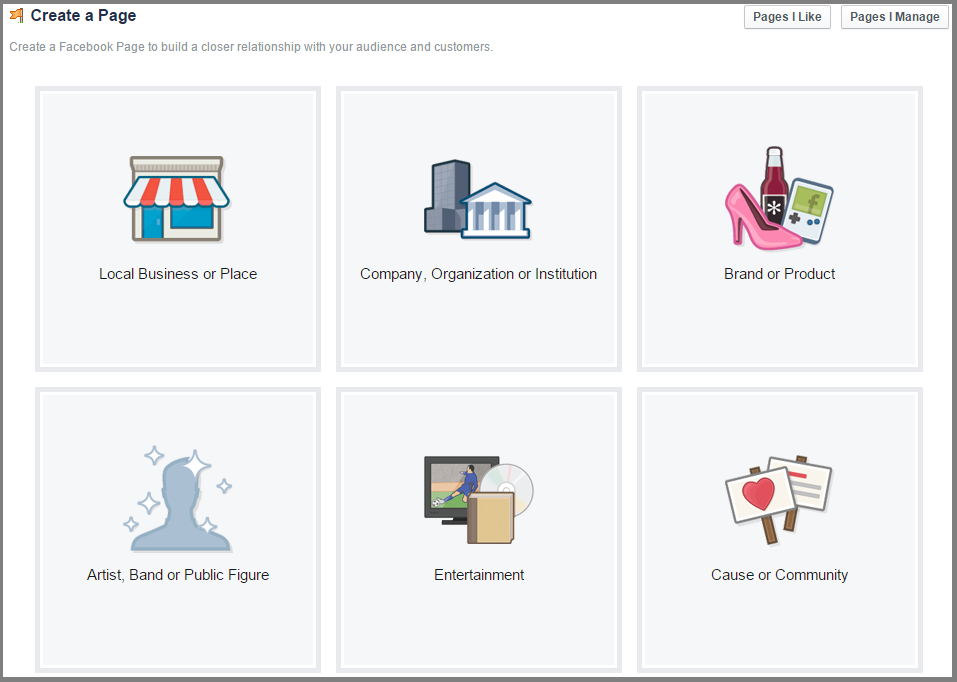
To begin creating your Facebook Fan Page, visit www.facebook.com/pages. From here you will see the six different Page categories:
- Local Business or Place (best for: businesses with a physical location)
- Company, Organization or Institution (best for: digital products)
- Brand or Product (best for: product sold by multiple retailers)
- Artist, Band or Public Figure (best for: promoting yourself)
- Entertainment (best for: TV shows, books, albums, podcasts)
- Cause or Community (best for: short-term causes, local communities)
Each category has various drop-down menus with the exception of Cause or Community. These drop-down menus let you choose a more detailed description of your business and can also help you choose which category is best for your particular business's needs.
Just remember, once you choose a Page category you are stuck with it forever. You can go back and chance the type of business inside of that category but you won't be able to switch from Cause or Community to Local Business or Place.
2. Completely fill out your About section
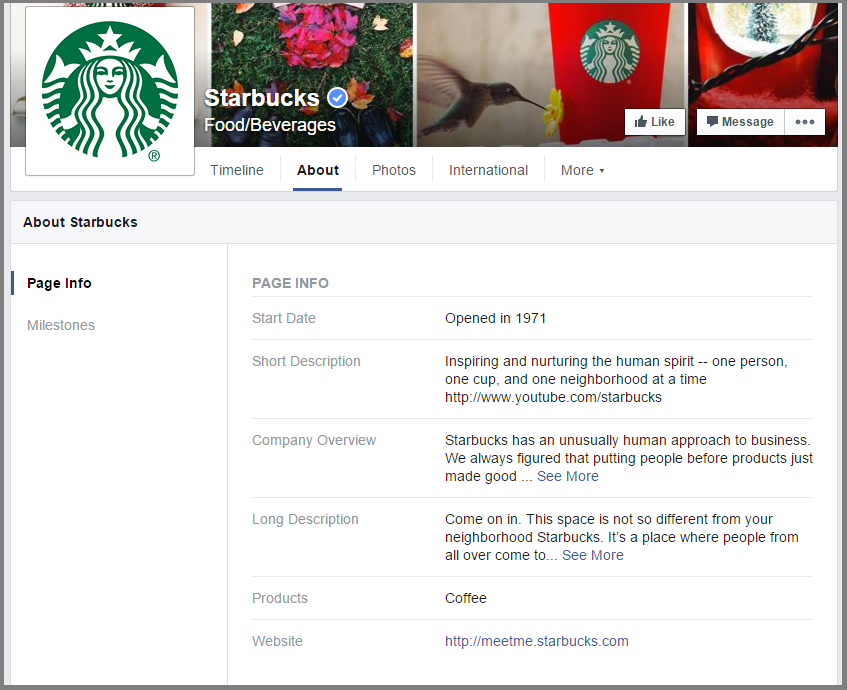
After you have chosen your Page category then you will be asked to fill in relevant information about your business. This starts with the About section. This is one of the most important areas of your Page since Facebook Graph and Google Search both pull from the information you include here.
In order to make your About section as optimized as it can be, try to weave in the following:
- Keywords – If you have done your homework and know what keywords attract your ideal customer then this is the place to use them! However, don't get caught keyword-stuffing. Make sure to use your keywords in a way that sounds natural and not forced.
- What You Do – This is crucial for those who have no idea who you are or what products and services your business provides. Give visitors a quick and easy to understand description of what you do.
- Who You Serve – Likewise, if you can speak directly to your ideal customer then you have a better opportunity of getting a new Fan. Have a weight loss program made especially for busy moms? Then say so!
- A Little Bit of Credibility – Give a little bit of insight into why your visitors should Like your Page and trust you for the particular service or product you provide. For example, in my About section I mention that I am a “Forbes Top 10 Women Social Media Influencer, CEO of Boom Social, Social Media Marketing Expert, Author, Huffington Post Contributor….”
- Fully Fill It Out! – If those visiting your Page want to expand your About section then make sure you have all your information filled out. It's frustrating to try and get more information about a business but unable to find anything on a company's Facebook Fan Page.
You also want to make sure that you use a great website link for this section. This link could be your homepage, a Facebook-specific landing page, newsletter sign-up page, freemium opt-in page, or a product page.
The last part of this About section set-up is your vanity URL or username as Facebook likes to call it. In the past, Facebook required you to have 25 fans before you could create your vanity URL but now Pages can set it up from the get-go!
3. Choose your profile picture
When you're setting up your page, Facebook will ask you to choose your profile picture. Whatever you do, DON'T leave this blank as nothing looks worse than a Fan Page with no profile picture. It's kind of like an egghead profile picture for Twitter in that it denotes a Page probably isn't active.
When you're choosing your Profile Picture, keep in mind that it will automatically be cropped into a square. Facebook says it needs to be at least 180px x 180px, but we normally triple the size of all our profile pictures so there isn't any loss of resolution when we upload them. In this case, we would recommend making your profile picture at least 540px x 540px.
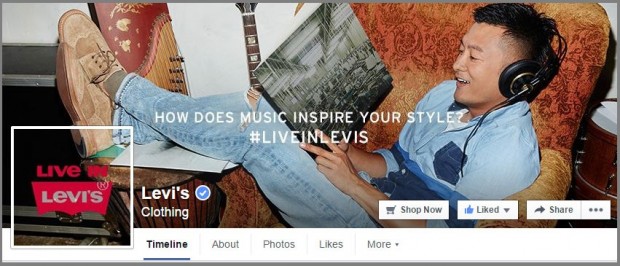
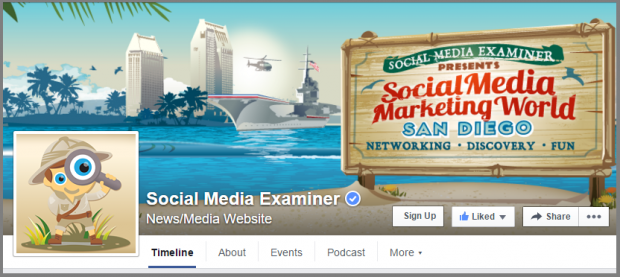
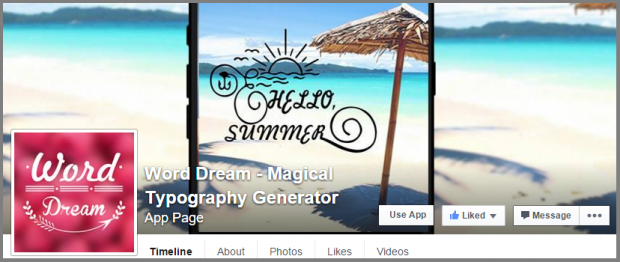
You could use a company logo, product picture, headshot, upcoming event, or even get a little crazy and create a seamless profile picture-cover photo combo like this:
4. Add your Facebook Fan Page to your Favorites
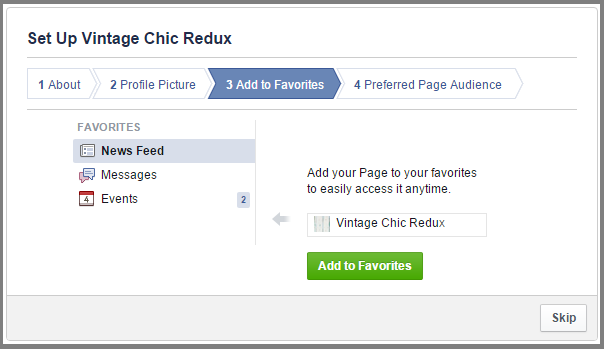
This step of the process is fairly simple as it's just one click of a button during the set-up process.
By clicking the green ‘Add to Favorites' button, your Page will automatically be added under your Favorites section of your home screen, which makes it much easier to get to as opposed to trying to sort through the other various ways you can get to it. Now it will show up front and center in the left sidebar instead of having to go under the Pages menu and clicking it there.
5. Input your Page Audiences
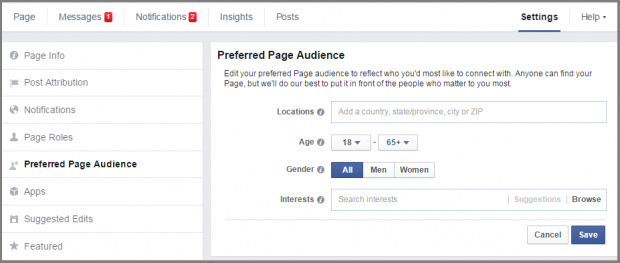
When you get to the last step of the simplified Page set-up process, you'll be asked to designate your Preferred Page Audience. No, you're not setting this up for your Ads platform; this is to pinpoint exactly what demographic of your future fans should see the majority of your posts.
If you aren't sure what to put in this section then there are other places where you can grab it!
- Other Social Media Insights/Analytics – while your audiences may change platform to platform, this is a good place to start. If you think your Instagram followers may be similar to your Facebook fans then take some of the audience data from Instagram and use it here.
- Use an Analytics Tool – I use a combination of AgoraPulse and a tool called Simply Measured. Both give me a better look at who is engaging with me on social media and if my message needs to be tweaked any to reach that ideal audience.
Now, this option still isn't available to all older Pages but hopefully you will get access soon if you already have a Facebook Fan Page and are looking to make sure it's optimized.
If you want to see if your older page has this option or if you want to change your Page Audience, you can do so by going to your Page settings and clicking on the ‘Preferred Page Audience' on the left.
6. Upload a timeline cover photo
Timeline cover photos can be one of the most underutilized aspects of a Fan Page. For example, did you know after you upload a new timeline cover that you should go back and add copy to that photo so people can find out more information?
It used to be that you couldn't use your timeline cover to promote, but that's no longer the case. The 20% text rule is also no longer in effect! Though, your cover is not allowed to be “deceptive, misleading or infringe on anyone else's copyright” per Facebook's Pages Terms.
In order to optimize your timeline cover, I recommend that you double the size so no resolution is lost when you upload it. That means when you create it, make the photo 1702px x 630px.
You should also either have an element in the photo that showcases or points out your CTA button, or include a link to where you want your visitors and fans to go.
And like I mentioned earlier, don't forget to add a description to your timeline photo so those that click on it can get more information.
7. Add a link to your CTA button
At the end of 2014, Facebook announced that Pages could now choose to have a CTA (call-to-action) button prominently displayed in their timeline cover photo area.
This was a HUGE announcement to those with Pages as we're now able to have our fans and visitors perform an action of our choosing with some slight encouragement.
There are seven calls to action that a Page admin can choose from:
- Book Now
- Contact Us
- Use App
- Play Game
- Shop Now
- Sign Up
- Watch Video
8. Create eye-catching graphics
So I talked about seven ways to optimize your Facebook Fan Page so far; however, that optimization doesn't stop after you are done creating the page, it actually continues on into what you post on the Page. Posting the right content is one more step in the optimization process.
As far as sourcing great visual content, I love using Post Planner to see what has already gone viral and then change it to sound more like my own voice.
Then, I create the actual graphic using any of the following: Canva, Typorama, Word Swag, and Legend. Canva is a desktop tool while the other three are mobile apps, which make it even easier to create those eye-catching graphics on the go.
9. Engage with your fans
Why is engaging with your fans part of this process to optimize your Facebook Fan Page? Because engaging with your fans is part of building a community that will like, comment and share your posts.
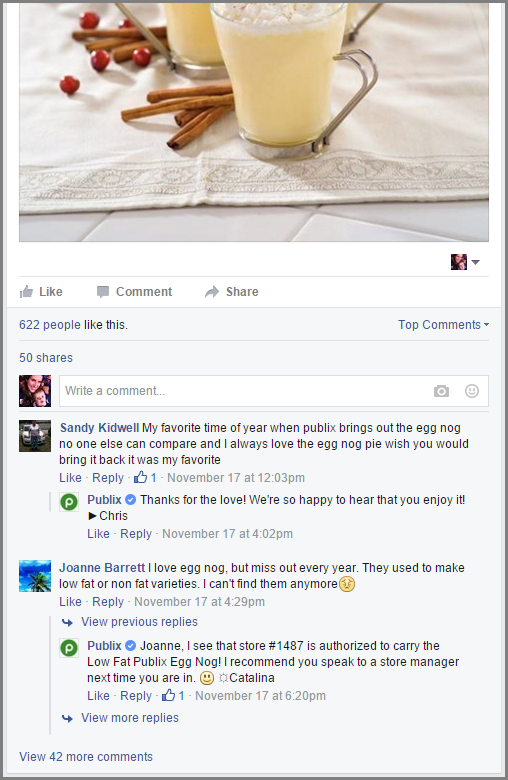
It shows visitors that you are present and not the post-it-and-leave-it type; you can get greater insight into what you fans like by seeing which content they engage with most; you can use it as a customer service method; and the Posts to Page can give you an even better opportunity to get some more one-on-one time with fans that have questions or thanks yous.
Publix is a great example of a company who uses social media as a customer service tool.
These 9 tips to set up an optimize a Facebook Fan Page aren't only just for new Facebook Fan Pages, but can help those who already have a Fan Page set up but in need of some optimization. Taking the time to make sure all the pieces and parts are in place can help you grow your fan base as well as your know, like and trust factor, which as you may have heard me say before, ultimately grows a community of people that will continually buy from you.
Do you have any other Facebook Fan Page optimization tips? Share them below!
About Author
Kim Garst
Kim Garst is one of the world's most retweeted people among digital marketers. She is a renowed business strategist, keynote speaker and an international best-selling author of Will The Real You Please Stand Up, Show Up, Be Authentic and Prosper in Social Media. Kim helps business owners grow their business using social and digital media.
She is the founder of KG Enterprises, LLC, a business strategy consulting company that helps business owners create more sales using the power of digital and social media.
Kim is also internationally recognized as a thought leader in the social media space. Forbes named her as one of the Top 10 Social Media Power Influencers. Her blog is one of the top social media resources in the world.
You can find more great content from her at www.kimgarst.com/blog.

