![How to Schedule Your Posts on Facebook [New Information!]](https://kimgarst.com/wp-content/uploads/2014/01/210055_SchedulePosts_800x420_051818.png)
Have you ever wanted to schedule your Facebook posts hours, days, or even weeks in advance? While Facebook has offered the ability to schedule posts for years now, recent changes have made the process much easier.
There are many reasons why you may want to schedule your posts ahead of time:
- To have your page updated when you may be otherwise occupied. You will likely want to schedule your posts for days and times when your fans are most active, however you may not always be able to be at your computer during these times.
- Scheduling your posts allows for consistent, reliable posting. Even with the best of intentions, it’s easy to forget to post, or for something to distract you or keep you from your computer.
- It allows you to spread out your updates rather than posting them all in one fell swoop. You may have an hour now to post, but rather than post all 6 of your updates in a row, why not spread them out evenly over the entire day or week?
If you are ready to start scheduling your posts, follow the 3 simple (and I mean SIMPLE) steps below. And don't forget to read through to the end of this post for some additional helpful tips for Facebook scheduling!
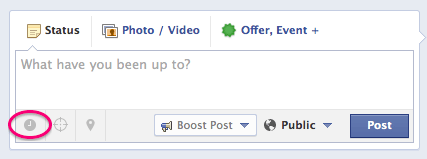
Step 1: Go to your page’s post update box.
Just as you normally would, go to your Facebook page and type in your update. As always, you can use a text-only update, a link, a photo or a video (offers and events work differently, and are beyond the scope of this post).
Below the input box, you will see a little clock icon; click on it to begin scheduling your post.
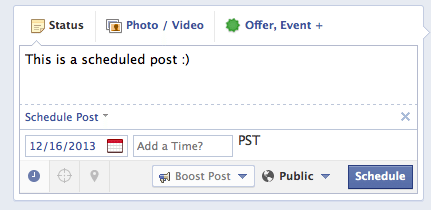
Step 2: Enter in the date and time.
If you have used Facebook post scheduling in the past, here’s where you will notice something different, and oh-so-wonderful! While you used to have to go through a convoluted process of manually entering dates and times, Facebook now uses today’s date as the default, and an easy-to-use time field. To enter the time, simply start typing (e.g. 3:00) and it will give you some time options in a drop down box.
If you would like to schedule a post for a future date, simply click on the little calendar to select the date.
Please note that the time zone will by default be the one connected to your Facebook account. If you would like to schedule your post for another time zone, you will unfortunately need to do the calculations yourself and manually enter the appropriate time in your default zone.
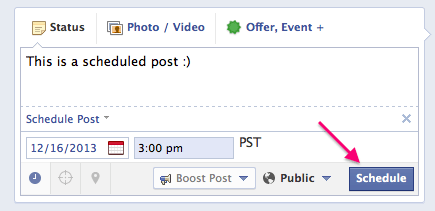
Step 3: Hit Schedule
It’s as simple as that! Hit schedule and your post is ready to go.
A few additional comments:
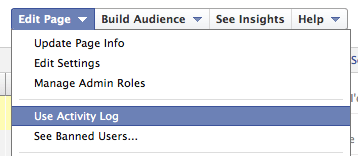
Want to View, Edit or Delete a Scheduled Post?
It is possible to edit or delete a scheduled post. To view scheduled posts, visit your page’s Activity Log. To access this, go to your Facebook page and click on ‘Edit Page’ at the top right hand side of your screen. From there, click ‘Use Activity Log’.
Voila! You will see a list of all the posts you have scheduled. From here you can edit or delete your posts.
Want to Backdate a Post?
In the same way you might backdate a blog post to place it in chronological order, you can backdate your Facebook posts. You may want to use this feature to add in posts or photos from momentous or significant occasions – like the day your business opened or a time you were featured in a particular media publication.
Note that backdated posts will appear in your fans’ newsfeeds, however they will be placed in chronological order on your timeline – not on the date you actually post the update.
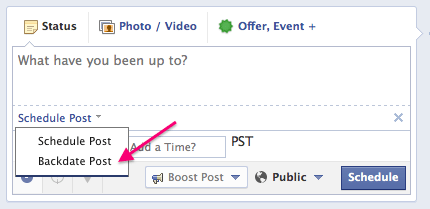
To backdate a post, simply click on the clock icon in your post update box, and then click on ‘Schedule Post’, and then ‘Backdate Post’.
Do you use Facebook scheduling for your posts? How about backdating? How do you use these features? Share with us below!

3 thoughts on “How to Schedule Your Posts on Facebook [New Information!]”
Simply awesome. Thank you Kim for sharing your ways in this post. Enlighten me to schedule whenever I am tight up for the time
The scheduler rocks in my opinion 🙂
It is a fun feature!