Have you ever wondered what video tool you should be using in your business?
Have you seen those super-cool videos other businesses post on their websites or on social media?
You know what I’m talking about: those catchy little videos where they introduce a product, promotion or blog post, or share a short tutorial or inspirational video?
Or what about those Instagram stories that look like they were created by a pro?
How do they DO that??
Today, I’m going to share with you the top-secret video tool (which won’t be so secret anymore!) I use to create AH-MAY-ZING videos for my business.
If you’re interested in creating video content for your business – but don’t have the time, money or technical skills to create something that actually looks good – keep reading.
But First…Why You SHOULD Be Using A Video Tool in Your Business
If you’ve been on the fence about using video in your business, I just want to quickly try to convince you. Hear me out…
Three reasons you NEED to be using a video tool are:
- People are watching more video-based content than ever. Each year, people spend more and more time watching videos; and it’s estimated that by 2021, the average person will spend 100 minutes every day watching videos online.
- Having trouble getting people to engage with your content? According to Smart Insights, 53% of customers engage with a brand after watching one of their videos on social media.
- Need traffic to your website or blog? 74% of people say they either “sometimes” or “very often” visit a publisher’s page after watching their video.
In light of all this, why aren’t more businesses using a video tool?
Fortunately, after reading this post, you’ll realize that there’s absolutely a way to create video content quickly, inexpensively and without any video-editing skills whatsoever!
How to Use the InVideo.io Video Tool for Your Business
I’m always testing out new video tools, so I can recommend only the BEST of the BEST to my audience!
I’ve been using InVideo for a while now to create video content for my business, and my team and I LOVE it. You literally need NO technical or graphic design skills to use this video tool. It’s basically like Canva for video (And you know how much I LOVE Canva!).
To make a video, you simply create a free account, and then choose from one of their many – MANY! – video templates. You can then customize the video using their super-simple video editor.
Some of the templates you can choose from include:
- Brand promo videos
- Intro/outro videos
- Short or long-form ads
- Social media videos
- Offers and coupons
- Video invitations
And while these are all super cool, my favorite feature of InVideo is their “Article-to-Video” tool, which lets you easily create a video out of an existing blog post. How cool is that?!
(By the way, I’ll walk you through exactly how to convert a blog post to a video below…for free!).
Here are just a few examples of videos you can create with InVideo:
A Brand Promo Video

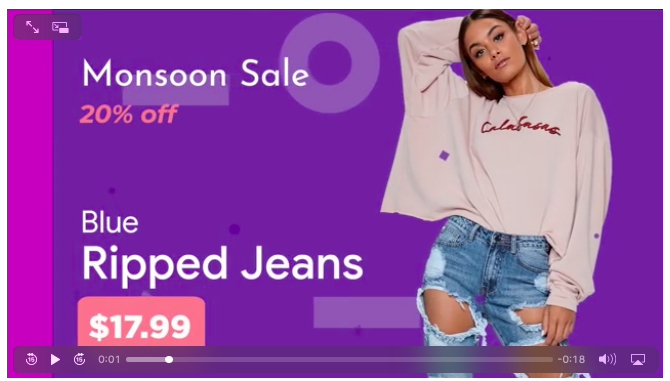
A Video Promoting a Sale or Event

A Video Quote to Share On Social Media

A Social Media Video Ad

And these are just a few examples of what you can do using the InVideo video tool.
Feeling a little intimated about creating your first video on InVideo.io? I get it!
Following is a step-by-step tutorial that will show you just how easy it is to create professional-looking videos…literally within minutes.
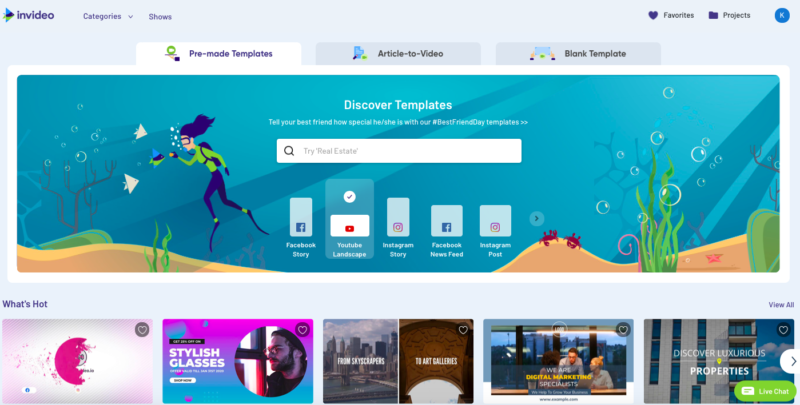
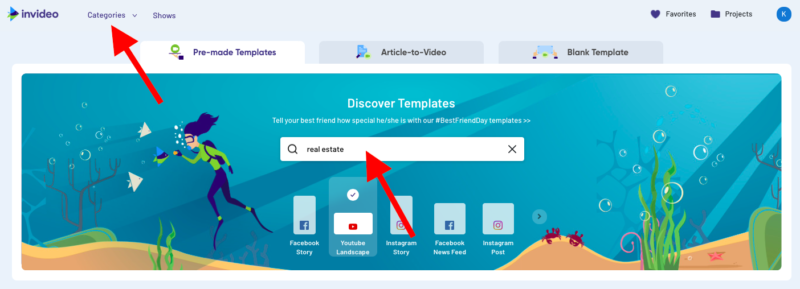
Step 1: Choose a Template.
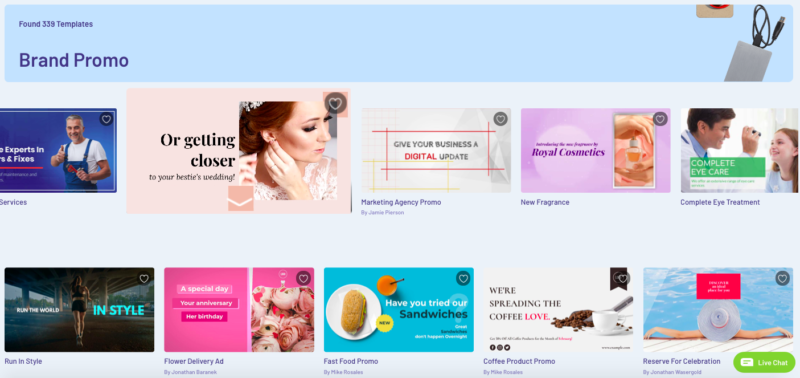
After logging in, the first thing you need to do is choose a video template. You can do this by clicking on the Categories link at the top left of your screen, or by typing your keywords into the search box:
Personally, I like to browse through the template library to make sure I don’t miss any amazing templates!
From the categories page, you’ll be able to see exactly what types of templates are available. Some categories include product video ads, motion quotes, listsicles, “snackable” videos, and brand promos.
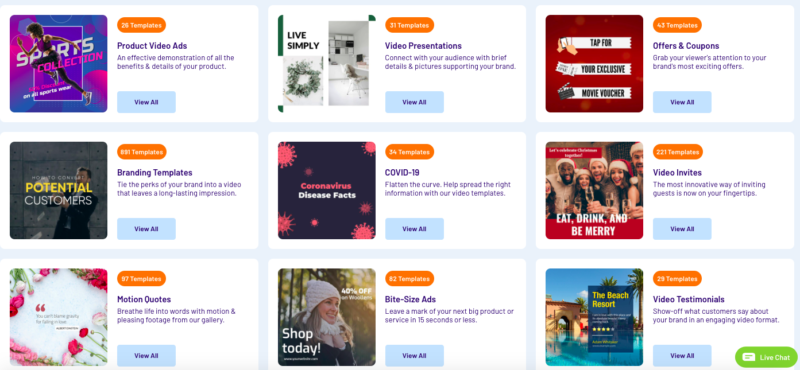
To see all the templates in a particular category, click on View All. You can now scroll through dozens or even hundreds of different templates in that category. And when you find one you might like, simply hover over it to see a live preview.
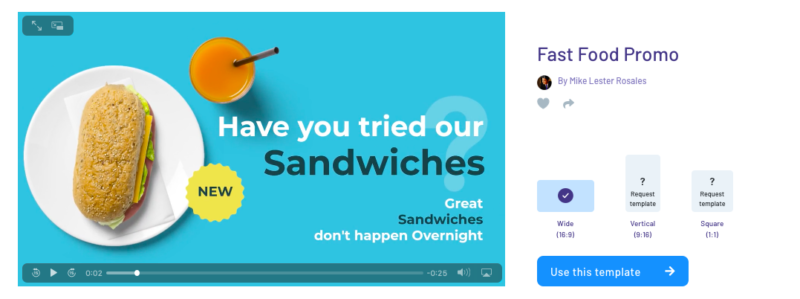
When you find the template you want to use, click on it to customize the size (for instance, 16:9, 9:16 or 1:1), and then click “Use this template” to start customizing your video.
Step 2: Customize the Main Content of Your Video.
The video editor is super intuitive and easy to use.
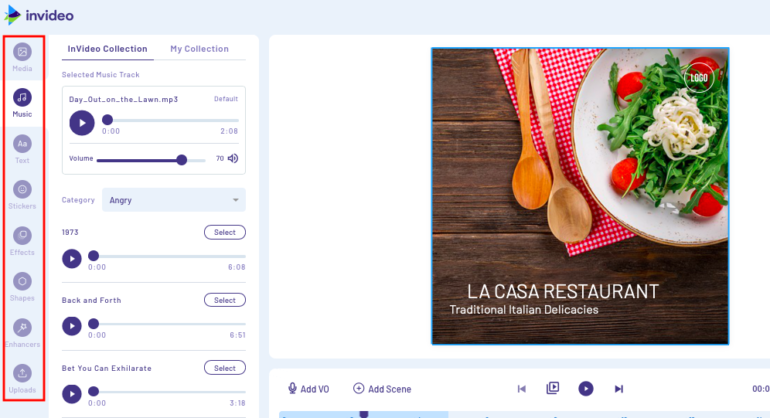
Once you’ve chosen your template, you can customize a number of different aspects of it, including:
- The media (images or video clips)
- Music
- Text
- Stickers
- Effects
- Shapes
- Enhancers (like collages or masks)
All of these options are easily accessible in the left sidebar of your screen:
Let’s say you basically want to leave the video as is, except add your own logo and change some of the text.
At the bottom of your screen, you’ll see the individual video clips and timeline. Click on whatever clip you want to customize.
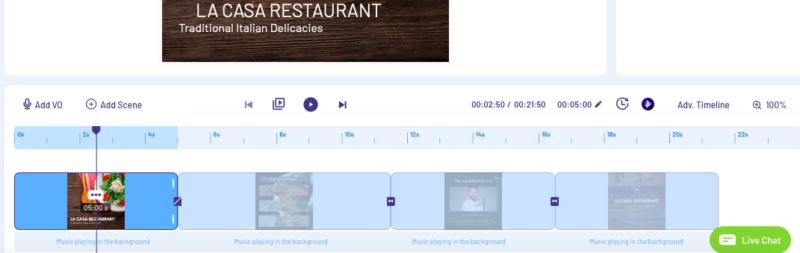
Now simply click on the element you want to change – like the logo, text or image – and change it!
And if you want to change the music or font, add a sticker or image, or insert another video clip, click on the appropriate icon in the left sidebar.
It’s that easy!
Now, remember that cool feature I mentioned earlier? The one that lets you turn a blog post into a video? Let’s take a look at exactly how to do this!
How to Turn a Blog Post Into a Video
If you want to leverage your existing blog posts, this is one of the best ways to do it.
Step 1: Choose a Template From the Article-to-Video Tool
At the top of the homepage, you’ll see the Article-to-Video tab. Click on it, and then select the type of video you want to make.
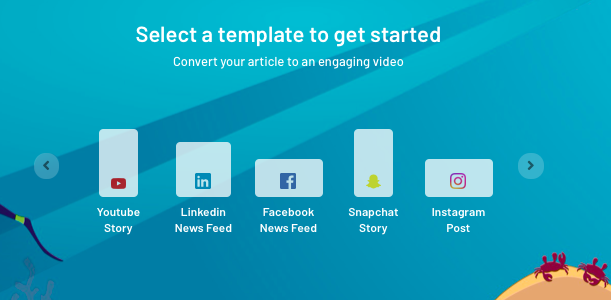
Some of the options include:
- Instagram post
- Facebook newsfeed post
- Wide or vertical video
- YouTube landscape
- IGTV
- Snapchat story
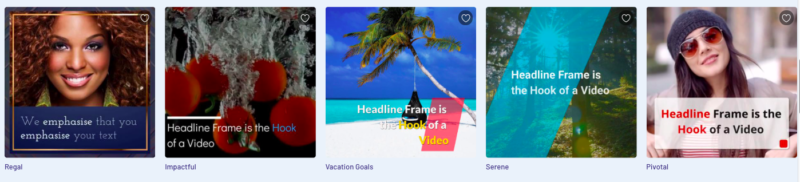
Now scroll through the templates until you find one you like. Click on it to start customizing it.
Step 2: Add Your Blog Post URL
There are actually a couple of ways you can go about creating your video using this video tool. But we want to do this as QUICKLY and EASILY as possible…right?
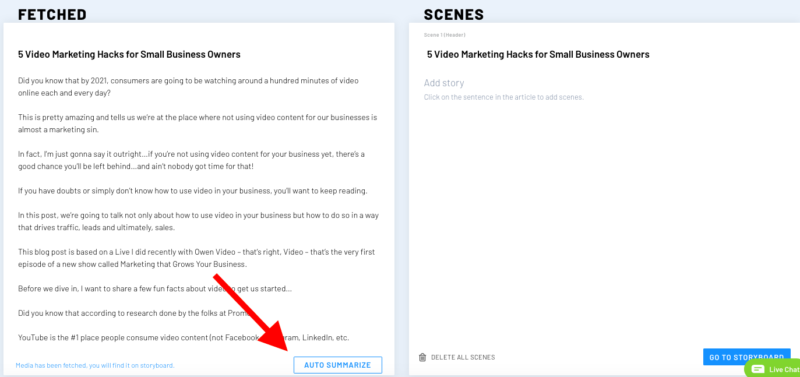
Once you’ve selected your template, you’ll get a screen like this:
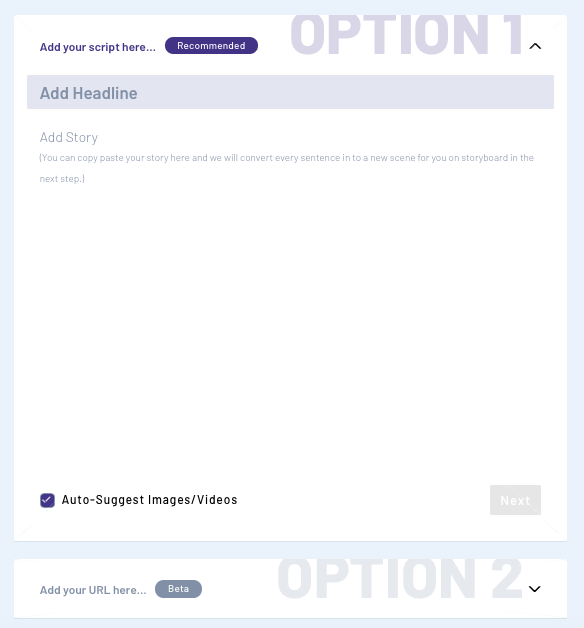
While you can add your own headline and content in the first box, we’re going to save a bunch of time by scrolling down to option 2: “Add your URL here”.
Add the URL of your blog post, click “Fetch”, and then wait for the magic to happen!
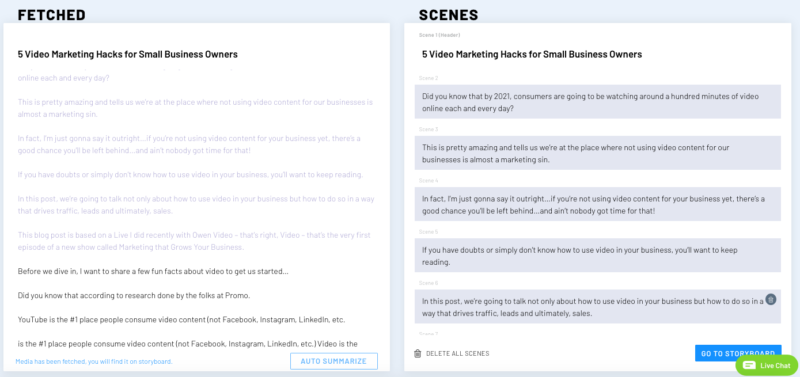
You’ll now see that the tool has grabbed all the content of your blog post. However, you’re not going to want ALL that content in your video. So to grab just the key points, we’re going to click “Auto Summarize”.
This is going to create “scenes” – or short blurbs of text – and add them to the right side of the screen, like this:
Now here’s where you have to do a little work!
Scroll through the scenes, and keep only the ones you want. And the ones you don’t want? Click the garbage can icon to delete them.
The video tool lets you keep up to 50 scenes, but recommends using fewer than 30.
Once you’ve narrowed your scenes down to the main points you want to include in your video, click the “Go to Storyboard” button in the lower right-hand corner.
Step 3. Customize Your Video as Needed
You’ll now see a complete video, populated with the scenes you selected in step 2!
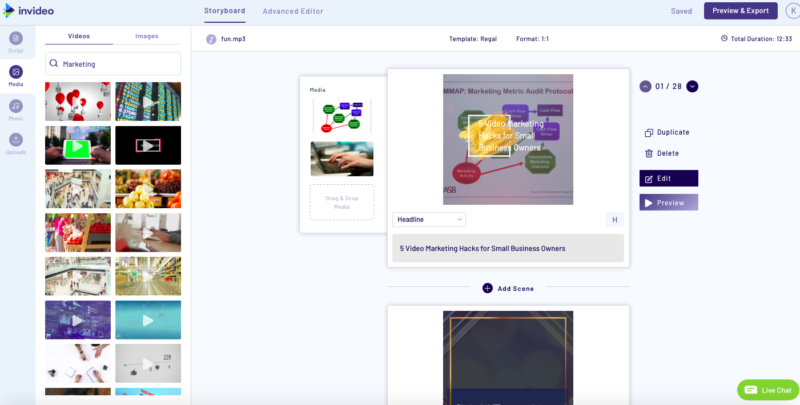
As with any video made using InVideo, you can go in and edit or customize each individual scene as needed.
Click on the edit button next to the scene you want to change, and then go ahead and edit away – you’ll find all the usual options in the left sidebar, like text, stickers, media and effects.
Pretty cool, right?!
Why I Prefer the InVideo Video Tool Business Version Over the Free Version
I LOVE that InVideo offers a fully-functional free version so you can see if it’s right for you. This means you can play around with it, create and edit a bunch of videos, and make sure it’s really as easy to use as I’m telling you it is!
However, there are some limitations to the free version, and the BIGGEST one is this – all your videos will come with the InVideo watermark.
So, while the free version definitely has its place, you’re likely going to want to upgrade at some point.
Not sure which version of InVideo is right for you? Here are the features of each version.
When you sign up for the FREE version of InVideo, you get:
- Access to 1 million+ videos and images, and 3000+ original templates
- Ability to use InVideo’s full set of video-editing capabilities
- Create up to 60 videos per month
- InVideo watermark on all your videos
When you sign up for the BUSINESS plan of InVideo you get:
- Access to all the videos, images and templates (same as the free plan)
- Create up to 300 videos per month
- Export up to 60 HD video per month
- Create videos up to 15 minutes long
- No InVideo watermark on your videos
Get the UNLIMITED plan if you want all the features of the business plan plus:
- Create an unlimited number of videos each month
- Export an unlimited number of HD videos per month
I hope this gives you a good idea of which version is right for you. And don’t worry – the premium plans aren’t going to cost you an arm and a leg, as the Business Plan starts at just $5/month when you pay annually (and it’s only $10 if you want to pay on a month-to-month basis). That's a 50% savings off the original price – just for my blog readers!
Final Thoughts
What I love about this video tool is that it levels the playing field for small business owners. You don’t have to hire a professional video producer to create professional-looking videos…and you also don’t have to purchase expensive video-editing software that can take months to learn!
I would love to know if you decide to use InVideo to create videos for your business. Drop a comment below and let me know!
5 thoughts on “The #1 Video Tool You Should Be Using in Your Business”
Hi there, that’s a complete tutorial. I really liked the way you explain this tool even a newbie can understand it thoroughly. Thanks for this step-by-step guide. This will surely help me in future.
I was reading this and i realy found what i was looking for your article is really informative and i’ll be grɑteful if ʏou keep writing in the future.
youtube marketing is the best thing to do. there are many sources to earn from it. thanks for sharing love your content.
Thanks for sharing such a wonderful tutorial.
Video editing is really a great skill and if you use right tool, then you can make amazing and creative video. This tool guide really amazing for me. Thank you for sharing it.