You may have heard about Facebook's new free, live streaming app, Facebook Live!
If you don't already love it, you are probably at least curious about what it is, how to use it and wondering if it can help you grow your business (Answer: YES! please)
You are hearing story after story of businesses doing amazing things with it, and think you should be too (you should!).
One little problem…
It actually requires you hitting the “Go Live” button and putting yourself out there, in real time, for people to see.
Gulp!
I can promise you this. Without a doubt, the hardest live broadcast you'll ever do is the very first one. Get that one under your belt and you will be rolling.
[clickToTweet tweet=”Without a doubt, the hardest live broadcast you'll ever do is the very first one.” quote=”Without a doubt, the hardest live broadcast you'll ever do is the very first one.”]
Having been exactly where you may be right now, I am gonna' see if I can help you along and guide you through how to do your first Facebook Live Broadcast.
Get Ready, Set…..
Facebook has made it pretty clear that just about everybody with a Facebook account will eventually get the Facebook Live app and be able to live stream from their desktop or mobile device onto their Facebook profile, Fan Page, event page or in a group.
Before you get your chance to “Go Live” to the world you will need to see if, and where you have the app and do a couple of other basic housekeeping chores.
If you haven't found, set-up or tested the app before, you will want to check out my recent How to Use Facebook Live post that will walk you through the set-up process, quick as a bunny.
You have access to Facebook LIVE. Now what?
Step 0 – Breathe and Press the Go Live Button
Yep, just breathe…and smile….
Then, whatever your favorite way of saying hello is, say it!
You see, this is easy and you are already off to a fabulous start. As people start joining your broadcast they will see you being warm, comfortable and welcoming.
Step 1 – Introduce yourself and establish credibility
This should be very quick but it's a very important part of the process. People usually want to know two things right up front 1) who you are, and 2) why they should listen to you.
The great thing is that you can prepare this part in advance and use the same opening, or a very similar version, every single time you go live.
Don't just wing it. Write it down, edit it, practice it on your friends and memorize it until it flows off your tongue effortlessly.
It should be 25 to 50 words long and you should be able to say it in 15 seconds or so.
It's your professional elevator speech and it is something you have at the ready at any time, not just for Facebook Live broadcasts but when describing to anybody, anywhere what it is that you do and why they should care.
After breathing and pressing the go live button (Step 0 above), run through your elevator pitch. If you can do it from memory, great. If not, read it (without appearing too obvious, of course).
Step 2 – Tell viewers what is in it for them ASAP!
People have short attention spans. They might like your warm smile and your welcoming demeanor, and they might even listen to your elevator speech and be convinced that your are worth listening to. But, if they don't immediately understand “what's in it for them”, what they get for sticking around, they will be gone in a flash.
[clickToTweet tweet=”If people don't immediately understand ‘what's in it for them', they will be gone in a flash.” quote=”If people don't immediately understand ‘what's in it for them', they will be gone in a flash.”]
Again, this is where planning in advance can help.
Try to make it so each Facebook Live broadcast has ONE major theme and ONE or TWO value-adds.
A “value add” is something specific to the subject you are covering that will help the viewer actually do what you are teaching or suggesting they do.
You see, people don't just want MORE information, they want to be able to actually do something with that information.
[clickToTweet tweet=”You see, people don't just want MORE information, they want to be able to actually do something with that info.” quote=”You see, people don't just want MORE information, they want to be able to actually do something with that info.”]
Take the first 30 seconds of a Facebook Live broadcast to convince the viewer that you have something valuable that will add value to their life in some way AND they are more likely to stick around for more.
Step 3 – Engage with Facebook Live viewers
People LOVE to hear their own name. Plus, it makes them feel validated and acknowledged. In groups it also has the effect of focusing everyone's attention.
Simply acknowledging people as they come onto the broadcast, by name, and as they make comments or ask questions turns the broadcast from a static event to a dynamic and personal chat.
Step 4 – Fish for questions, state the question and then answer it
Questions within a live broadcast are GOLD!
They do a few things. First, they extend the broadcast (see Step 5 below). Second, they involve the audience. Third, they allow you to add more color (details and examples) to your material.
But, what if people aren't asking questions?
Ask them to ask questions!
However, don't just ask them if they have any questions or tell them that they can ask questions if they want. That almost never works.
Here's how I do it.
Periodically throughout the broadcast I will ask people 1) What they think?, and 2) How they feel? about what ever it is I am talking about. I have found that people LOVE to give their opinion about just about anything. You just have to ask them to do so!
Once someone does ask a question, say or re-state the question before answering it. This gives context to your answer and brings everybody into the conversation.
Step 5 – Extend the broadcast
During your first broadcast you'll probably be likely to “Go Live”, say a few things and then bail as fast as you can. It's normal so don't fret if this is what happens to you. Over time, though, you will want to practice staying “live” longer than just a few minutes.
The reason is that as long as you are live, Facebook continues to serve your broadcast to more and more people…for free.
[clickToTweet tweet=”As you are live, Facebook continues to serve your broadcast to more and more people…for free.” quote=”As you are live, Facebook continues to serve your broadcast to more and more people…for free.”]
Having more material is one way to extend the broadcast, but spending time answering relevant questions is even better (see step 4 above).
Step 6 – Use a powerful Call to Action (CTA)
I never do a Facebook Live broadcast without a business goal in mind. Sometimes it is to sell a product or service. Other times it is to get people to opt-in to a free offer I may have or, at a minimum to “Like” my Fan Page.
One CTA you should ALWAYS use, however, is to ask viewers to subscribe to your broadcast. That way they will receive notifications for all of your future broadcasts.
That's it!
That's 6 quick little steps you can use to do your very first Facebook Live broadcast. Get this one under your belt and you will be off to the races
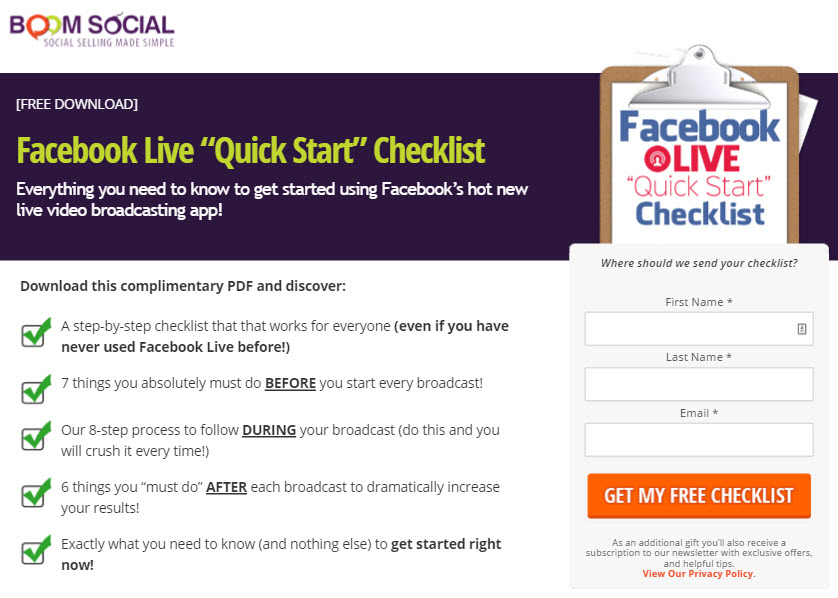
This Facebook Live Quick Start Checklist Should Help
I know that is a lot to remember. To help you out, I have created a “Facebook Live Quick Start Checklist” which you can get a copy of below.
In addition to helping you out DURING the broadcast, there are also two sections you can use for BEFORE and AFTER the broadcast.
Just feel out the form below and and I'll get that right over to ya'.
So, what do you think? Are you ready to do your first Facebook live broadcast? Also, if you have already done your first broadcast, I would love to hear how it went in the comments section below.
3 thoughts on “How to Do Your First Facebook Live Broadcast”
Indeed they are and I totally agree, Edison!
Congrats on starting your own biz!! Glad that I can be of value from an info standpoint. Wishing you much success!
Hello Ben! Yes, I am aware but I wanted to keep this article very simple for those that simply want to get started with Facebook Live.